Fillable PDFs: A Comprehensive Guide for Efficient Document Generation in DigiFi

Introduction
In today's fast-paced business environment, we understand that a lot of clients are constantly working with documents to manage their applications and data. As many industry professionals know, finding a tool that can efficiently automate this aspect of the process can be challenging. The ideal solution involves keeping document generation within the Loan Origination System itself, rather than relying on external vendors for integration. DigiFi has taken this need into account and has recently introduced an exciting new feature that aims to simplify and streamline document preparation - Document Generation. It lets the user upload a fillable PDF and use it to automatically generate files with dynamic content.
Given the growing interest in automatic document preparation, we thought it would be the perfect opportunity to provide a comprehensive guide on creating fillable PDFs. Our aim is to help you understand the process of making a fillable PDF that can be effectively used for various purposes, including document generation in platforms like DigiFi.
What is a Fillable PDF?
A fillable PDF form is a type of PDF document that allows the user to fill in interactive fields within the document. These fields can include text fields, checkboxes, radio buttons, dropdown lists and more.
Creating a fillable PDF typically requires some specialized software, such as Adobe Acrobat Pro or a similar PDF editing tool.
In this article, we'll walk you through the basic steps to create a fillable PDF form using Adobe Acrobat Pro.
Fillable PDF Instructions
Step 1: Open a file in Adobe Acrobat Pro
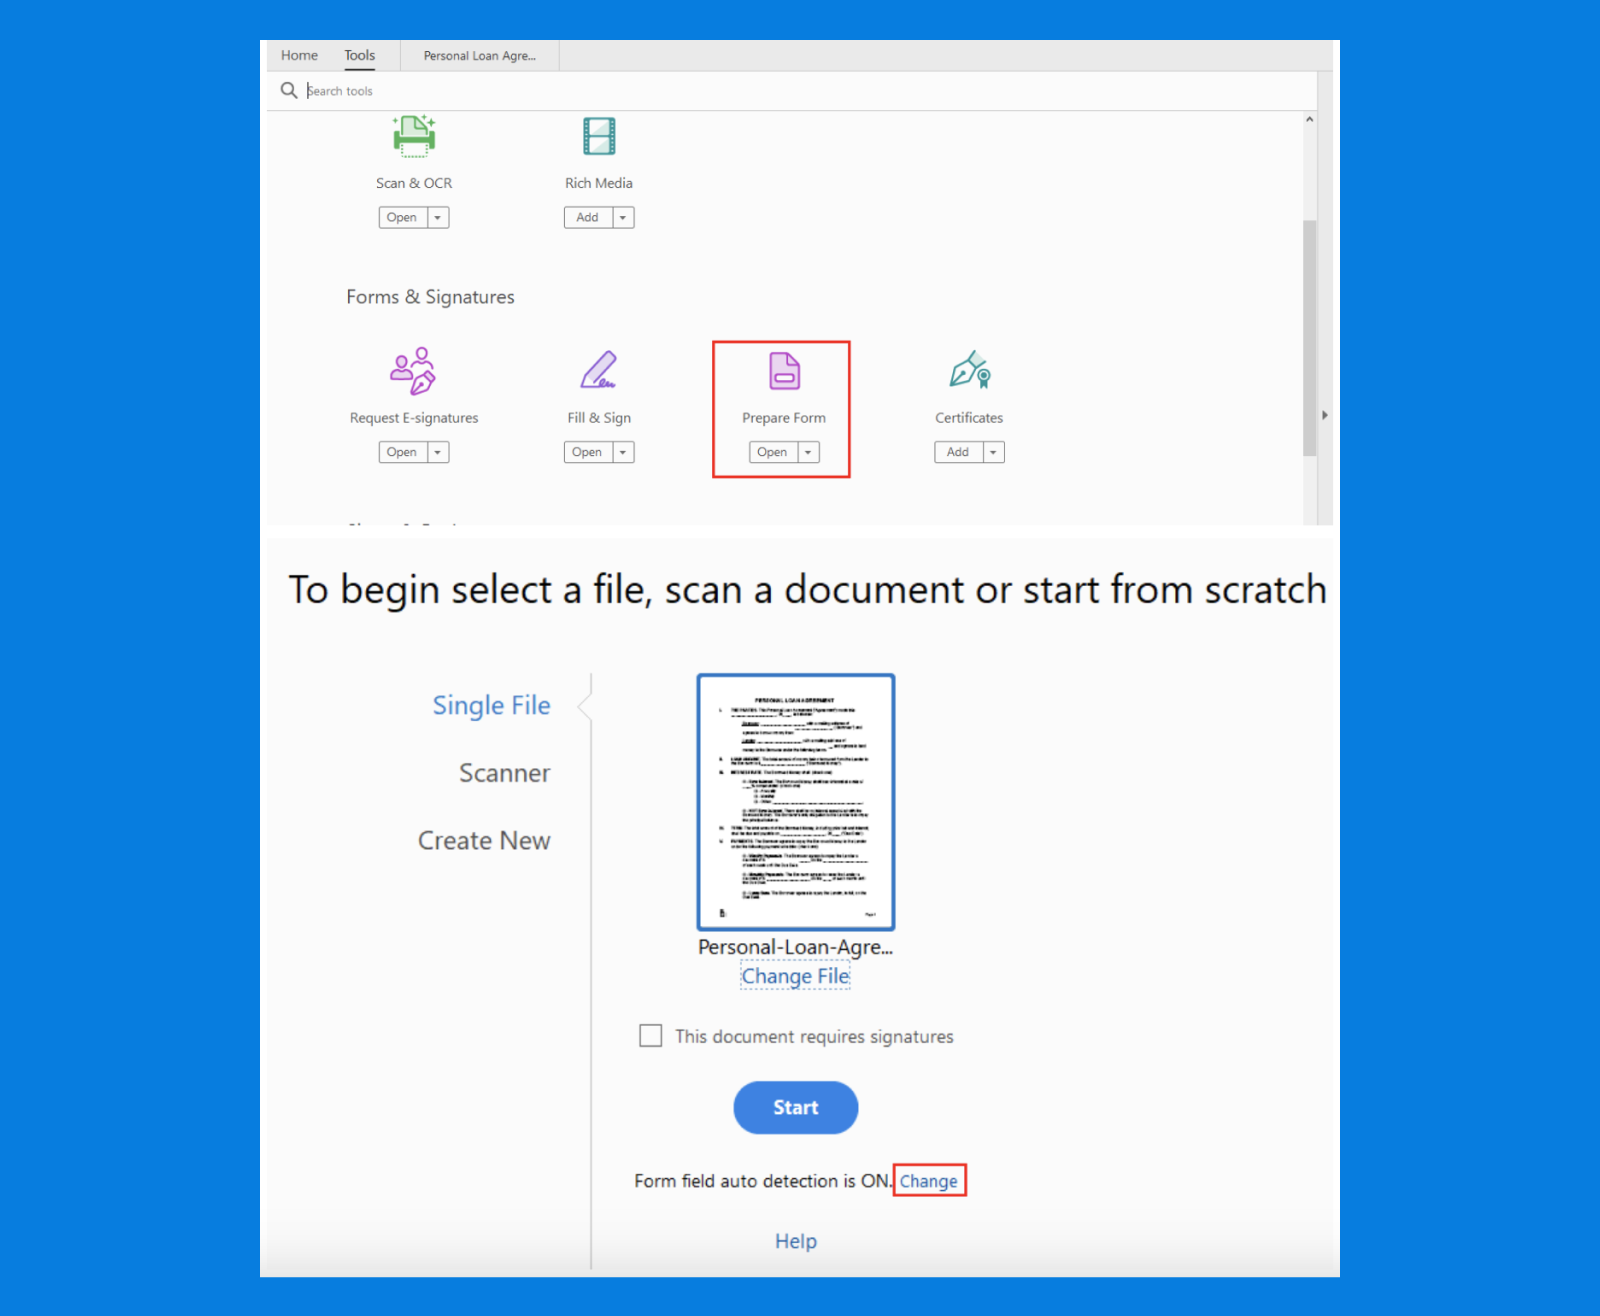
Open Adobe Acrobat Pro and click on “Tools” in the upper-left corner. On the page with tools, find “Prepare Form” and click on the “Open” button (if the tool wasn’t added to your express panel, click on “Add” first).
Select a file and then click on “Change” to turn off field auto-detection. In the pop-up that appears, un-tick the “Automatically detect Form fields” box and click “OK”.
Click on “Start” to start working on your fillable PDF.

Step 2: Get acquainted with form fields
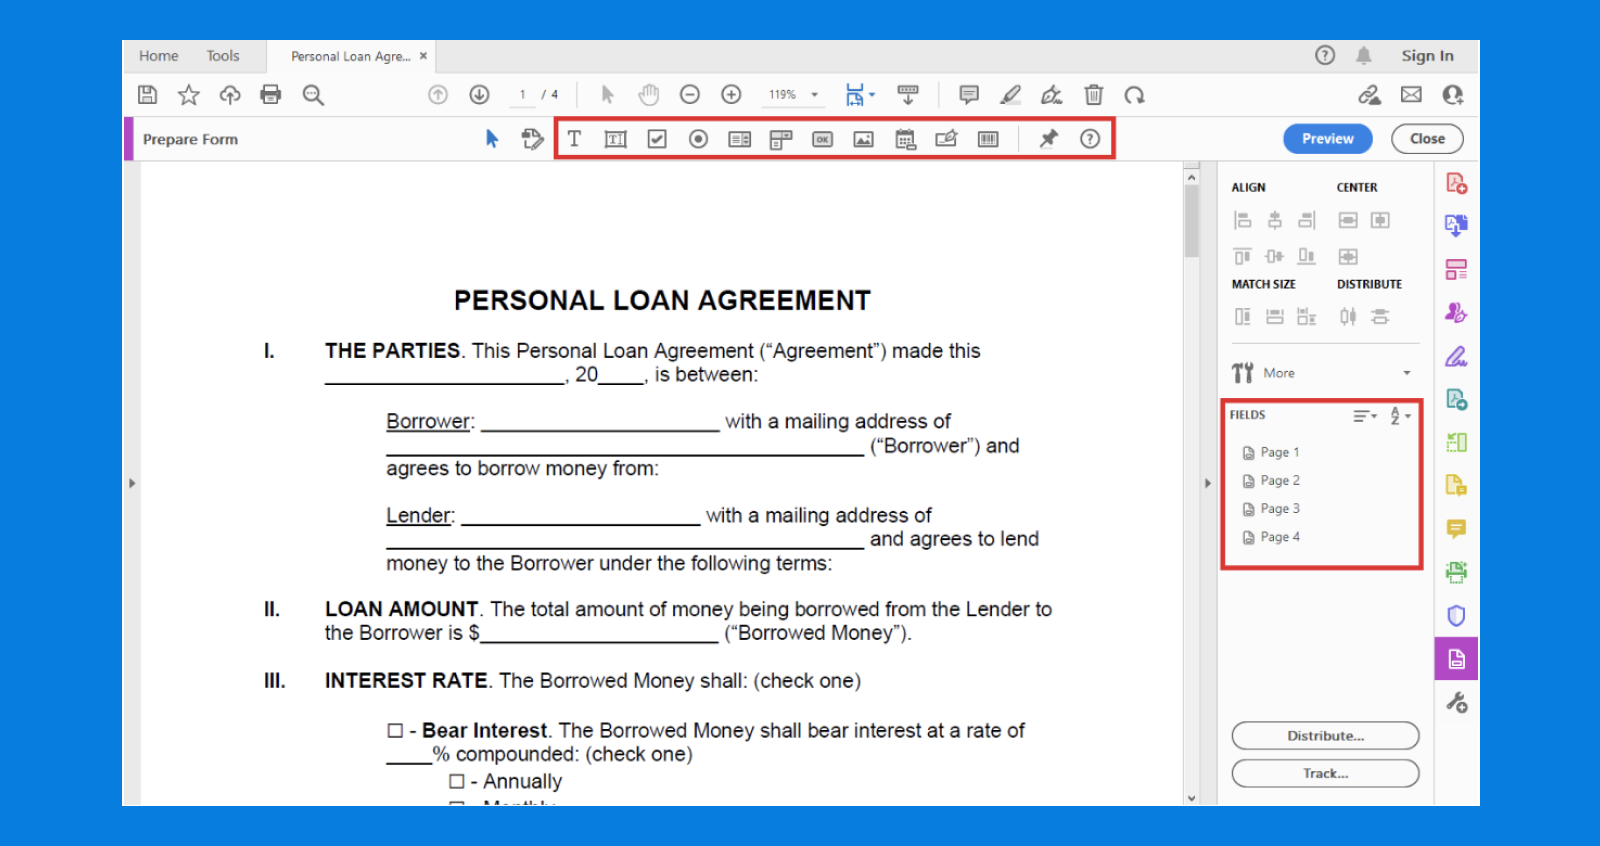
After opening a file, you’ll be forwarded to the form configuration page. Field types can be found at the top of the page, while the field configuration menu is located on the right-hand side.
Adobe Acrobat Pro offers a wide variety of field types that can be used to create fillable PDF files. The field types are the following:
- Text: Allows users to enter text into the form.
- Checkbox: Allows users to select one or more options from a list of choices.
- Radio Button: Similar to a checkbox, but only allows users to select one option from a list of choices.
- List: Similar to a dropdown list, but displays all of the options at once.
- Dropdown list: Allows users to select one option from a list of choices that are hidden until the user clicks on the field.
- Date: Allows users to select a date from a pop-up calendar.
DigiFi supports all the field types used by Adobe Acrobat Pro. When importing a fillable PDF to a DigiFi document template, the following field types are included:
- Text
- Checkbox
- Radiobutton
- Dropdown list (Select)
- List (Multi Select)
These fields can be mapped to DigiFi’s variables and then used in the document generation process. The application-specific values will be automatically populated in the generated document. Learn more about DigiFi’s document generation and field mapping here.
Step 3: Start adding fields to your form
To add a text field: Start by clicking on the “Add a Text field” button at the top of the page. It will create a customizable space for a text field, which you need to drag to the desired location on the form. Finally, name the field.

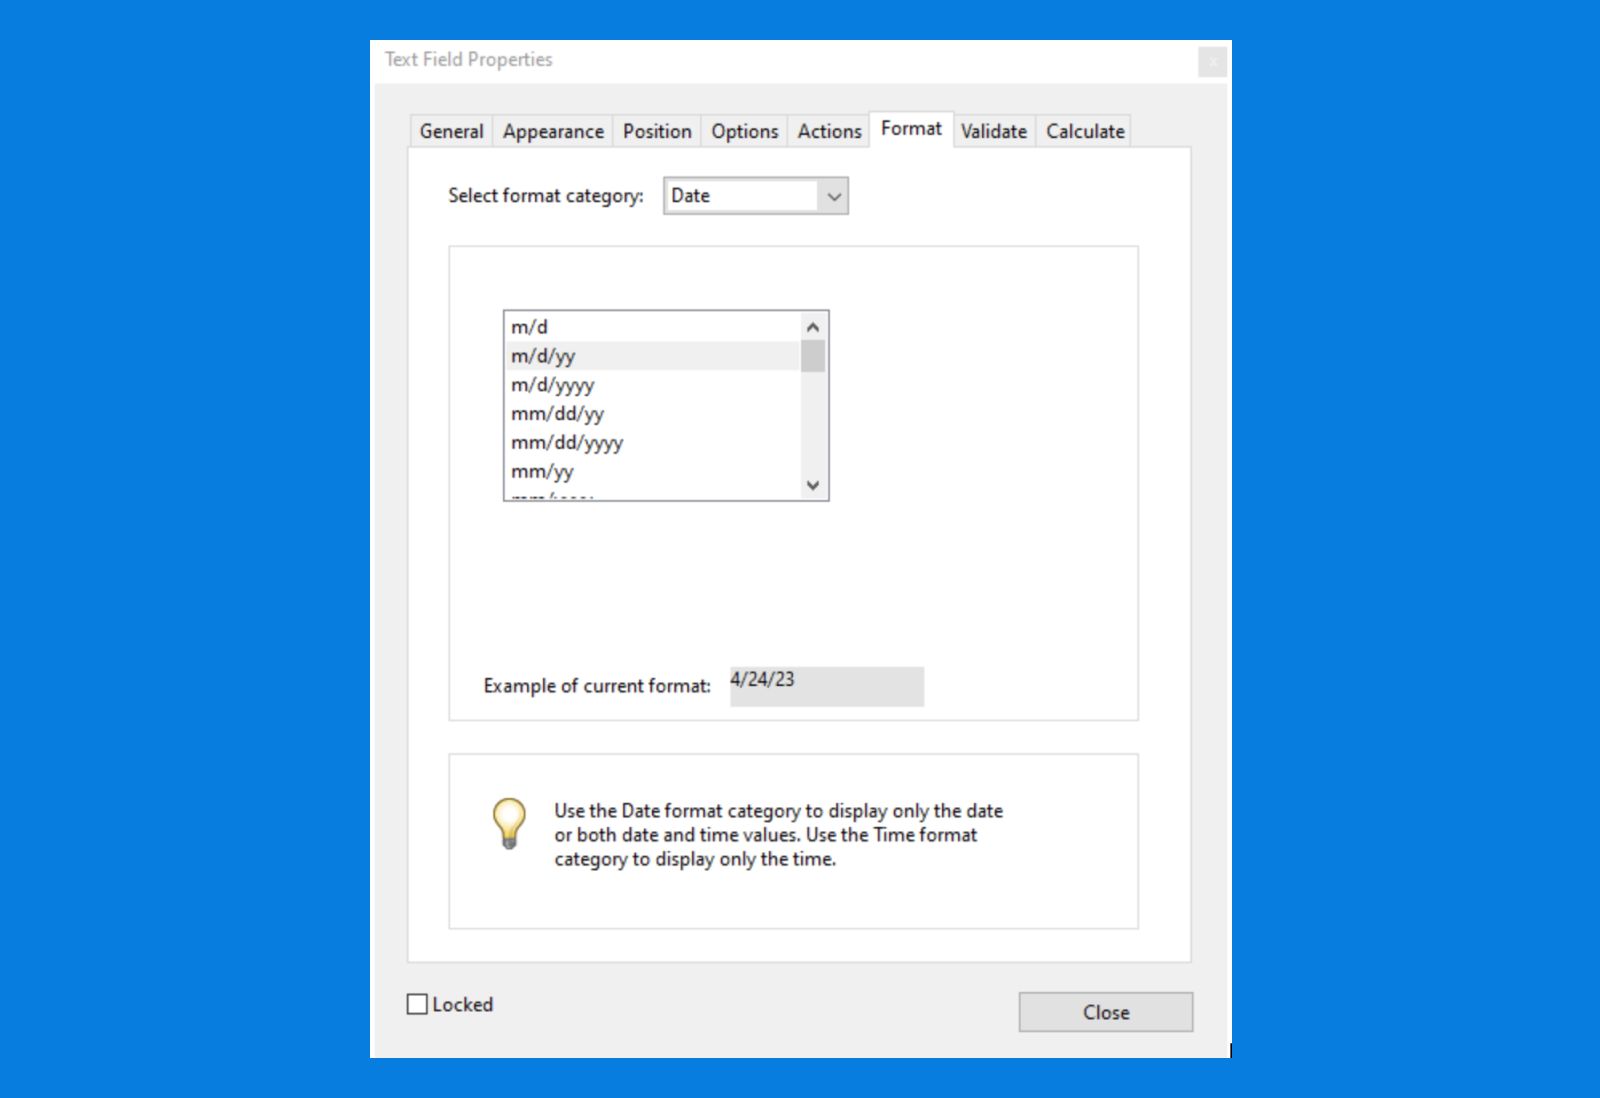
To add a date field: Start by clicking on the “Date” button at the top of the page. It will create a customizable space for a date field, which you need to drag to the desired location on the form. Click on “All Properties” to open a pop-up. Name the field, then click on the “Format” tab. Choose the appropriate date format from the list and click on “Close”.
To add a checkbox: Start by clicking on the “Checkbox” button at the top of the page. It will create a customizable space for a checkbox field, which you need to drag to the desired location on the form. Finally, name the field.
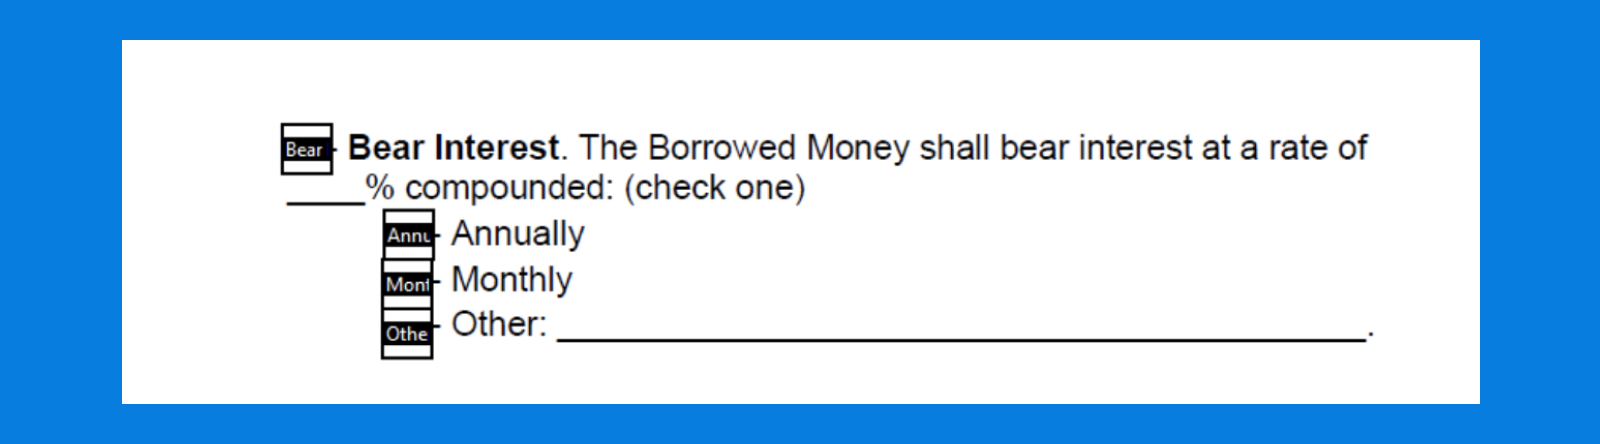
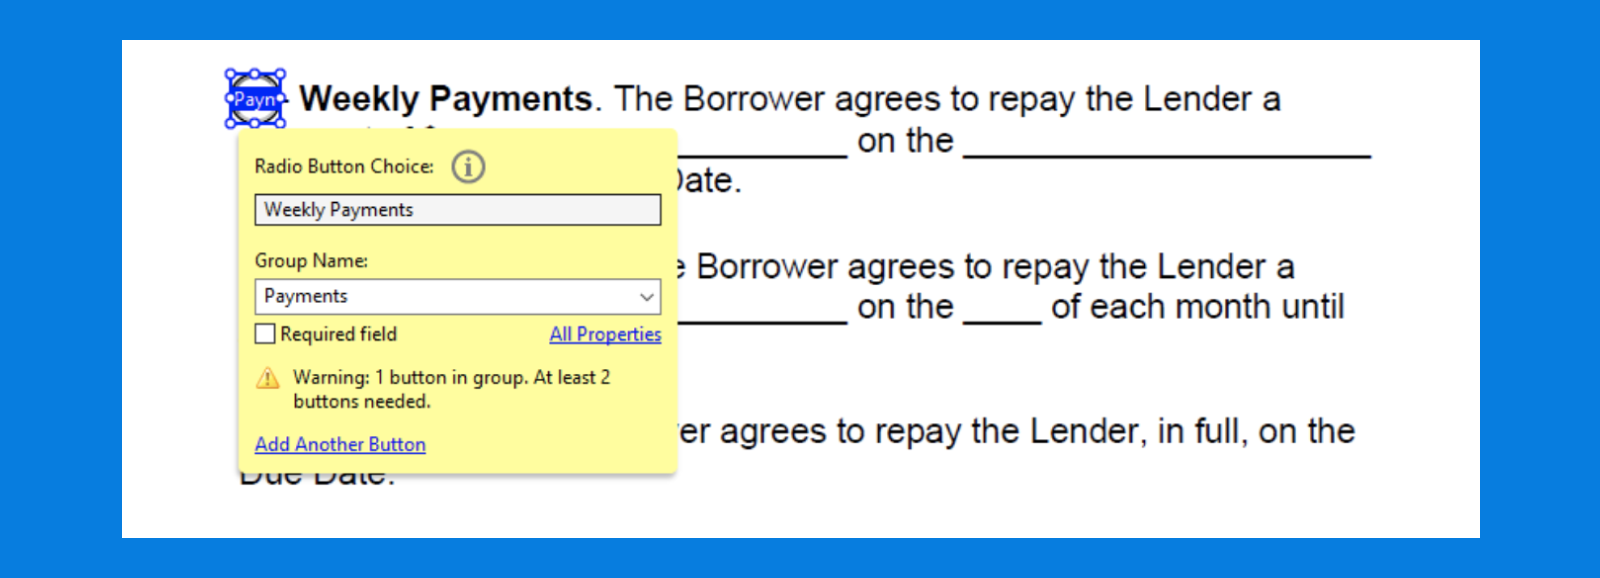
To add a radio button: Start by clicking on the “Radio Button” button at the top of the page. It will create a customizable space for a radio button field, which you need to drag to the desired location on the form. Add a “group” name for your radio buttons, then name an individual radio button field.
Please note: You have to create at least two radio buttons for one group.
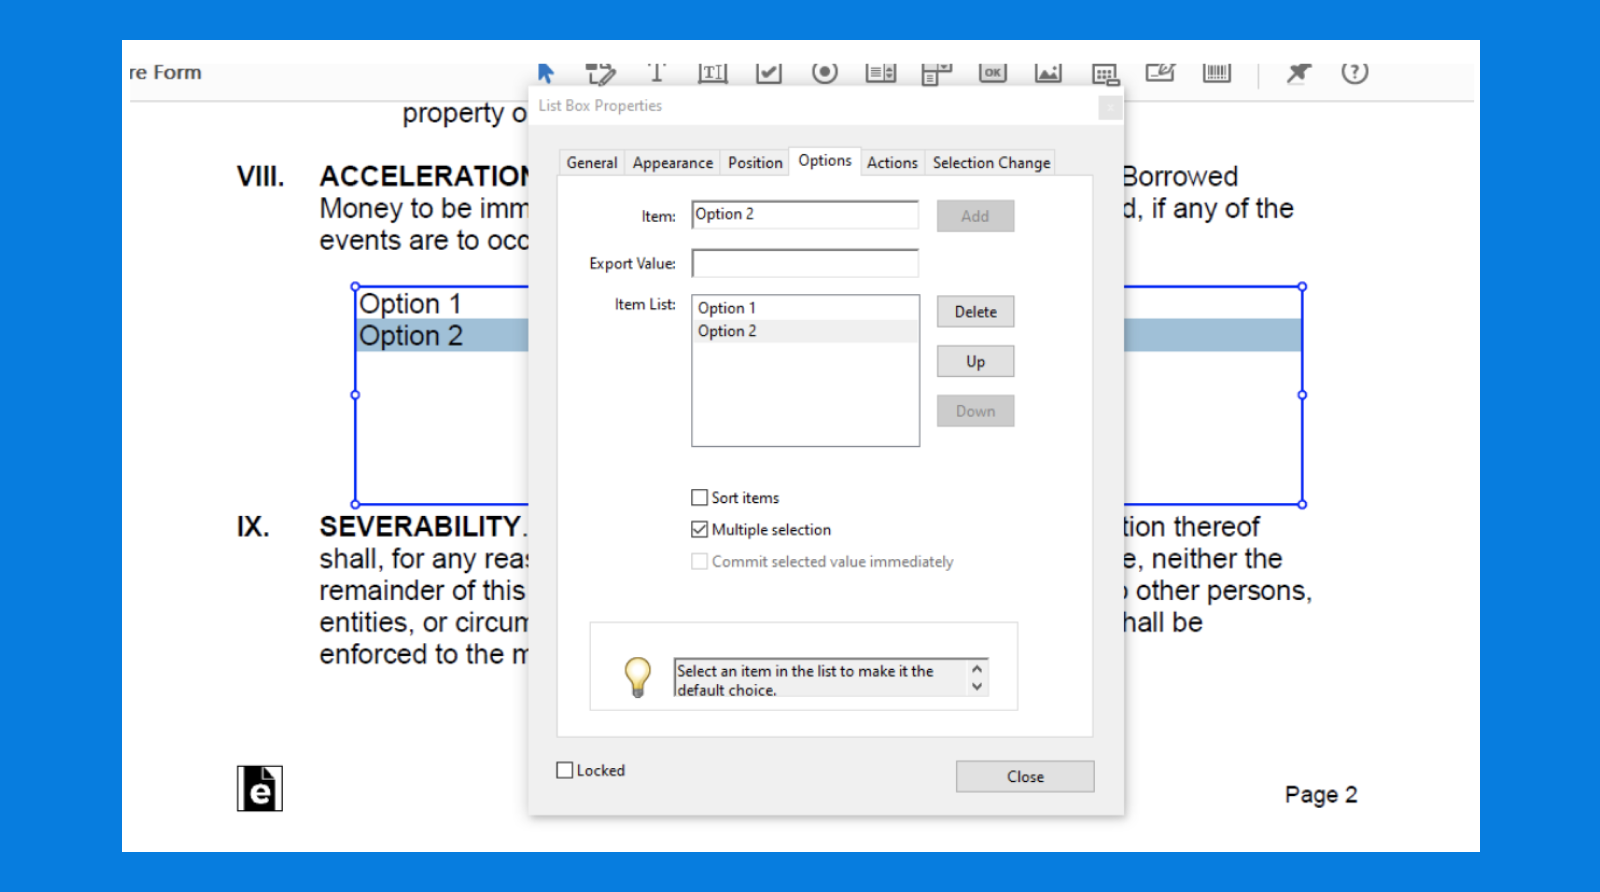
To add a list: Start by clicking on the “List” button at the top of the page. It will create a customizable space for a list of options, which you need to drag to the desired location on the form. Double-click on the field to open a pop-up. Name the field, click on "Options" tab, add an item name and click on "Add". Repeat for all options in your list. Enable "Multiple selection" and click on "Close".
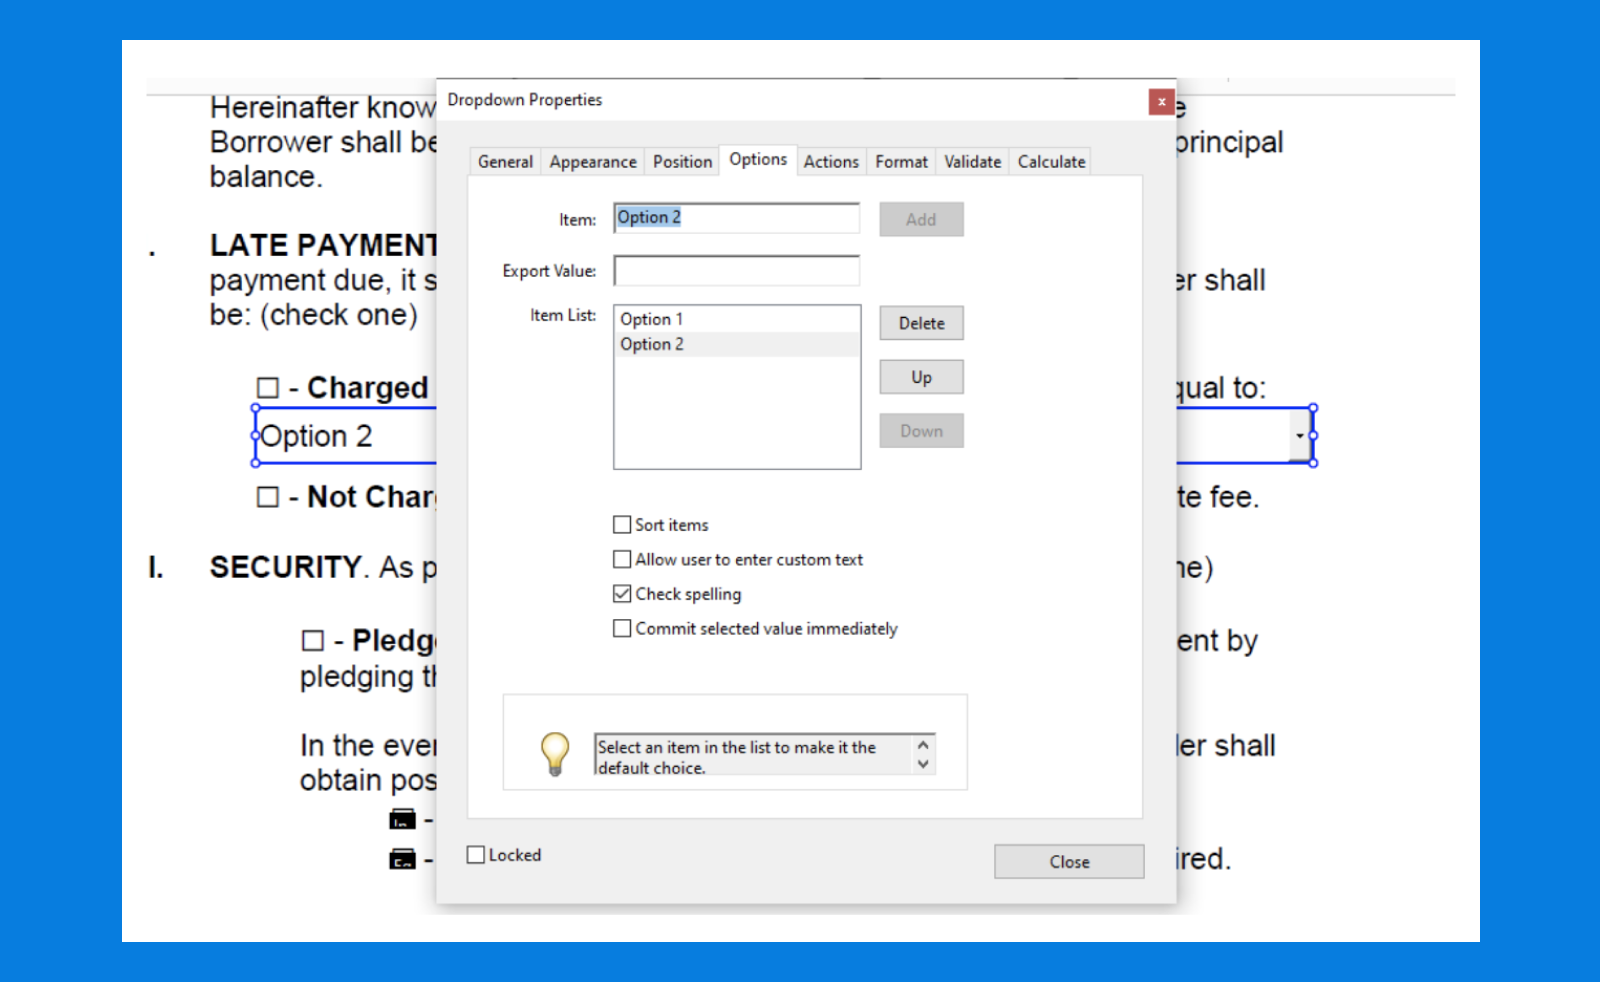
To add a dropdown list: Start by clicking on the “Dropdown List” button at the top of the page. It will create a customizable space for a dropdown list, which you need to drag to the desired location on the form. Double-click on the field to open a pop-up. Name the field, click on "Options" tab, add an item name and click on "Add". Repeat for all options in your list and click on “Close”.
Step 4: Save your fillable PDF
When you've finished customizing your form, save it as a PDF file. To do this, click on "File" in the menu bar and select "Save As." Give your file a name and select the location where you want to save it.
Conclusion
In light of the ever-evolving business landscape, we highly encourage you to explore the DigiFi platform and its new features, including Document Generation. DigiFi offers document generation capabilities, while Adobe Acrobat Pro allows users to produce a wide range of fillable PDF files. These files can be seamlessly integrated with platforms like DigiFi for producing dynamic content. Following the provided guide, users can effectively create fillable PDF forms, making application and data management more streamlined. Ultimately, businesses can greatly benefit from leveraging the power of automation and document generation to improve their overall performance.
published May 23, 2023